Branding & Production
Embroidery Digitising vs DTF: Preparing Artwork for Corporate Uniforms
Prepare the right logo files, size and placement brief, and sample approval process for embroidery or DTF uniform branding.
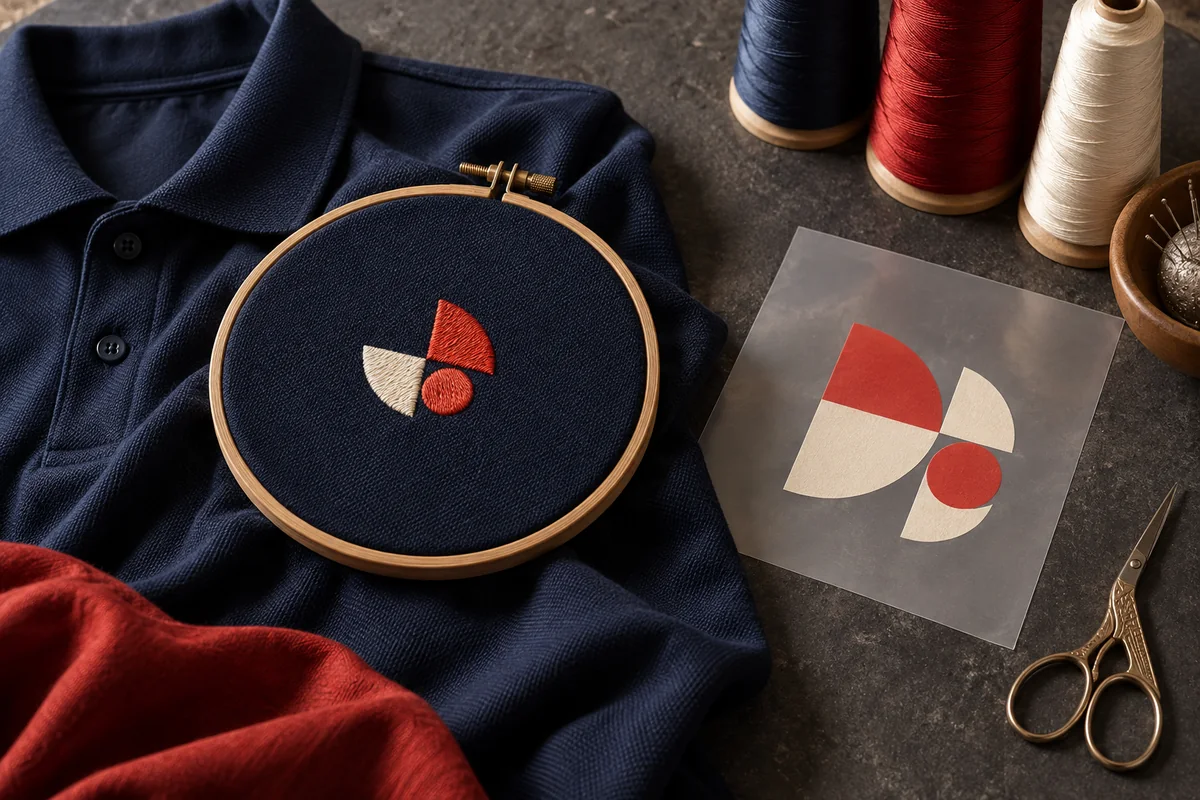
A logo that looks excellent on a website may need careful preparation before it belongs on a uniform. Screen artwork uses light and pixels; a decorated garment adds fabric texture, physical size and a production method. Choosing embroidery or direct-to-film printing is therefore only part of the decision. The artwork, placement and approval process must fit that choice.
For a purchasing team, the aim is straightforward: colleagues should receive garments with a clear, consistent identity. This guide explains the different production paths, the files worth supplying and the checks that prevent avoidable surprises. It also sets out Sungrace's available branding options without assuming that every method suits every garment.
01
Decide what the decoration must communicate
Start with the viewing situation. A compact chest mark may need to remain recognisable during a conversation, while a back design may serve a different purpose across a room. Identify the essential part of the identity: the symbol, company name or a short approved descriptor. If the logo contains a long address or several tiny lines, decide whether those details genuinely belong on clothing.
Ask the internal brand owner for the current master artwork and a single approved version. Record which colours are essential and whether a simplified garment version is permitted. A useful brief names the garment, colour, decoration location and intended finished dimensions. This gives the supplier a concrete production question instead of asking them to interpret an unexplained logo attachment.
02
Understand what embroidery digitising changes
Embroidery digitising converts artwork into instructions for stitches. Wilcom's documentation describes selecting stitch types, directions and sequence, rather than merely saving the image with a different extension. It also distinguishes a stitch simulation from the original graphic. A machine-readable file represents a production interpretation of the artwork, so approval should consider the sewn result as well as the screen preview.
Give the supplier the intended final size before digitising. Ask whether small lettering or fine spaces need adjustment, and approve any simplification explicitly. Preserve the original brand file alongside the garment version so a practical sewing adjustment does not accidentally become the company's new master logo. Request an actual stitch-out on a relevant fabric when evaluating detail, coverage and how the decoration sits.
Further reading: Wilcom: Understanding Auto-Digitising ↗
03
Understand the DTF production path
DTF places the design on a transfer film before it is applied to the garment. Epson's guide describes printing, adding powder and heat, transferring with a heat press, and completing the specified fixing process. It also states that processing conditions depend on the materials and equipment. A generic temperature copied from another job is consequently not an adequate production specification.
For the buyer, the important approval object is the finished decorated fabric. Check the edge of the image, small details, unintended background areas and the feel of large solid shapes. Ask the supplier to establish suitable application conditions for the chosen garment. Do not infer wash performance from an attractive photograph of a transfer that has not yet been applied.
Further reading: Epson: DTF Film Printing Guide ↗
04
Send an artwork package that answers questions
Supply a vector master when available, plus a clearly named reference image showing the intended appearance. If only a raster image exists, provide the original exported file rather than a compressed screenshot. State the required finished width and height, including whether the proportions must remain locked. Ask the supplier which file formats and image resolution their workflow requires at that size.
Include a version date, colour references and a note explaining whether the background should print or remain empty. Convert or supply fonts as requested by the production team, while keeping an editable master internally. For multiple marks, attach a simple placement drawing showing which design belongs on each location. Name files by purpose, such as chest or back, so a large campaign design cannot be mistaken for the small company emblem.
05
Review small lettering at actual size
Enlarging a preview on a laptop can hide a basic problem: the final decoration may be much smaller than the image being reviewed. Print the proposed layout at actual size on ordinary paper as a positioning aid, then inspect a physical decorated sample. Read the smallest text without zooming. Check whether gaps remain visible and whether the company name is still clear against the garment.
Wilcom describes specialised small lettering with adjusted stitch construction, which illustrates why typography needs production judgement. It does not establish a universal minimum letter height for every fabric, thread and design. Ask for an achievable result for this particular combination. If detail remains crowded, consider an approved simplified chest mark and use the complete identity elsewhere only where the available branding option allows.
Further reading: Wilcom: Small Lettering and Lettering Tools ↗
06
Check the garment and placement together
Placement is a relationship between the decoration and the garment. A design that appears centred on a flat image may look different beside a placket, pocket or shoulder when worn. Mark the intended position using clear reference points and review it on the relevant style. For a size range, agree whether the decoration remains one size or requires an approved variation.
Sungrace offers embroidery and DTF chest branding at ₹50 each and back branding at ₹100 each. Sleeve branding is ₹50 and is embroidery only on polos and tees. Sungrace's corporate sweaters are 100% acrylic and accept embroidery only. These options define the enquiry; they do not replace artwork approval. Confirm the selected product, placement and final order details together through the bulk enquiry page.
07
Approve appearance and care performance
A hypothetical Jalandhar office might prefer an embroidered chest symbol on navy polos but use a more detailed approved back design for an event. Before committing, its coordinator should review both decorations on the selected garments, check spelling and ask colleagues to assess the feel. The example is a planning scenario, not a claim about a completed Sungrace project.
Retain the approved decorated sample and record its dimensions, position, colours and file version. Follow the agreed care instructions during a trial and compare the result with an unwashed reference. Note lifting, distortion, colour change or an uncomfortable change in hand feel. Any revision should receive a new version number and a clear approval; a casual request to make it smaller can otherwise create an unrecorded production change.
- 01Define identity
Choose essential logo details and finished size.
- 02Prepare files
Supply masters, colours and placement references.
- 03Select process
Confirm embroidery or DTF for the garment.
- 04Review sample
Inspect actual-size decoration on fabric.
- 05Release version
Approve care results and preserve the production reference.
08
Preserve the decision for the next order
Store the approved artwork and sample record in a shared folder with controlled editing access. Include the garment style and colour, because reusing the same design on another base requires a fresh suitability check. Keep employee names or department variants in a separate, checked list if they are part of an agreed order.
When requesting more uniforms, identify the approved version rather than forwarding an old compressed picture. Report any planned change in size, placement or garment. This allows the supplier to quote and prepare the right production work while your team maintains a consistent identity across new starters, replacements and seasonal clothing.
Sources and further reading
Technical references used for this guide. Confirm the specification and testing appropriate to your garment and order.